In my quest to eat the food I actually have in my fridge/freezer and cupboards instead of just stuffing them full of more food, today I made a Fridge Raider Special salad. I had made a batch of Quinoa (Keen-wah) which is a grain you can use in place of rice or couscous. It's an ancient grain that is very high in protein and it tastes good too. Well...that's not strictly true. It's crucial to rinse the grains well in cold water before cooking to rinse off the bitter coating. I have a foodie friend who hates quinoa as her one and only experience, in my opinion, was unrinsed before cooking. Still, she won't try it again. I happen to love it and it's very quick and easy to cook with a ratio of 2:1 of water to quinoa, just like rice. Bring it to a boil then reduce heat to very low, cover and cook for 10-15 mins til water is absorbed.
I also had in my fridge some fresh basil, some pureed mango left over from sushi night and some organic turkey smokie sausages. I try not to eat too much in the way of processed meats and sausages due to the nitrates/nitrites and additives and preservatives but McLeans make it on to my thumbs up list. They are also very lean as they are made from turkey. I buy them at Save on Foods and have seen them at a few other grocers too. They are a little more expensive than regular sausages so I only buy them once in a while.
Mango Turkey Sausage Quinoa Salad
1 cooked and chilled turkey sausage, sliced (Mcleans are already cooked)
handful spinach, torn
2 tbsp mango puree
handful basil, roughly chopped
1/2 cup cooked and cooled quinoa
juice of 1/2 lime or lemon
Mix it all together and serve!
I was pretty happy with this summery, light salad that took 1 minute to assemble and about 2 minutes to eat. Healthy, whole, filling and convenient all at the same time. I imagine that cilantro would also work well with the mango in place of basil and you could add nuts, avocado, seeds and other chopped veggies to boost flavour and general healthiness.
Sunday, July 17, 2011


Thursday, July 14, 2011
A little bit of a pickle
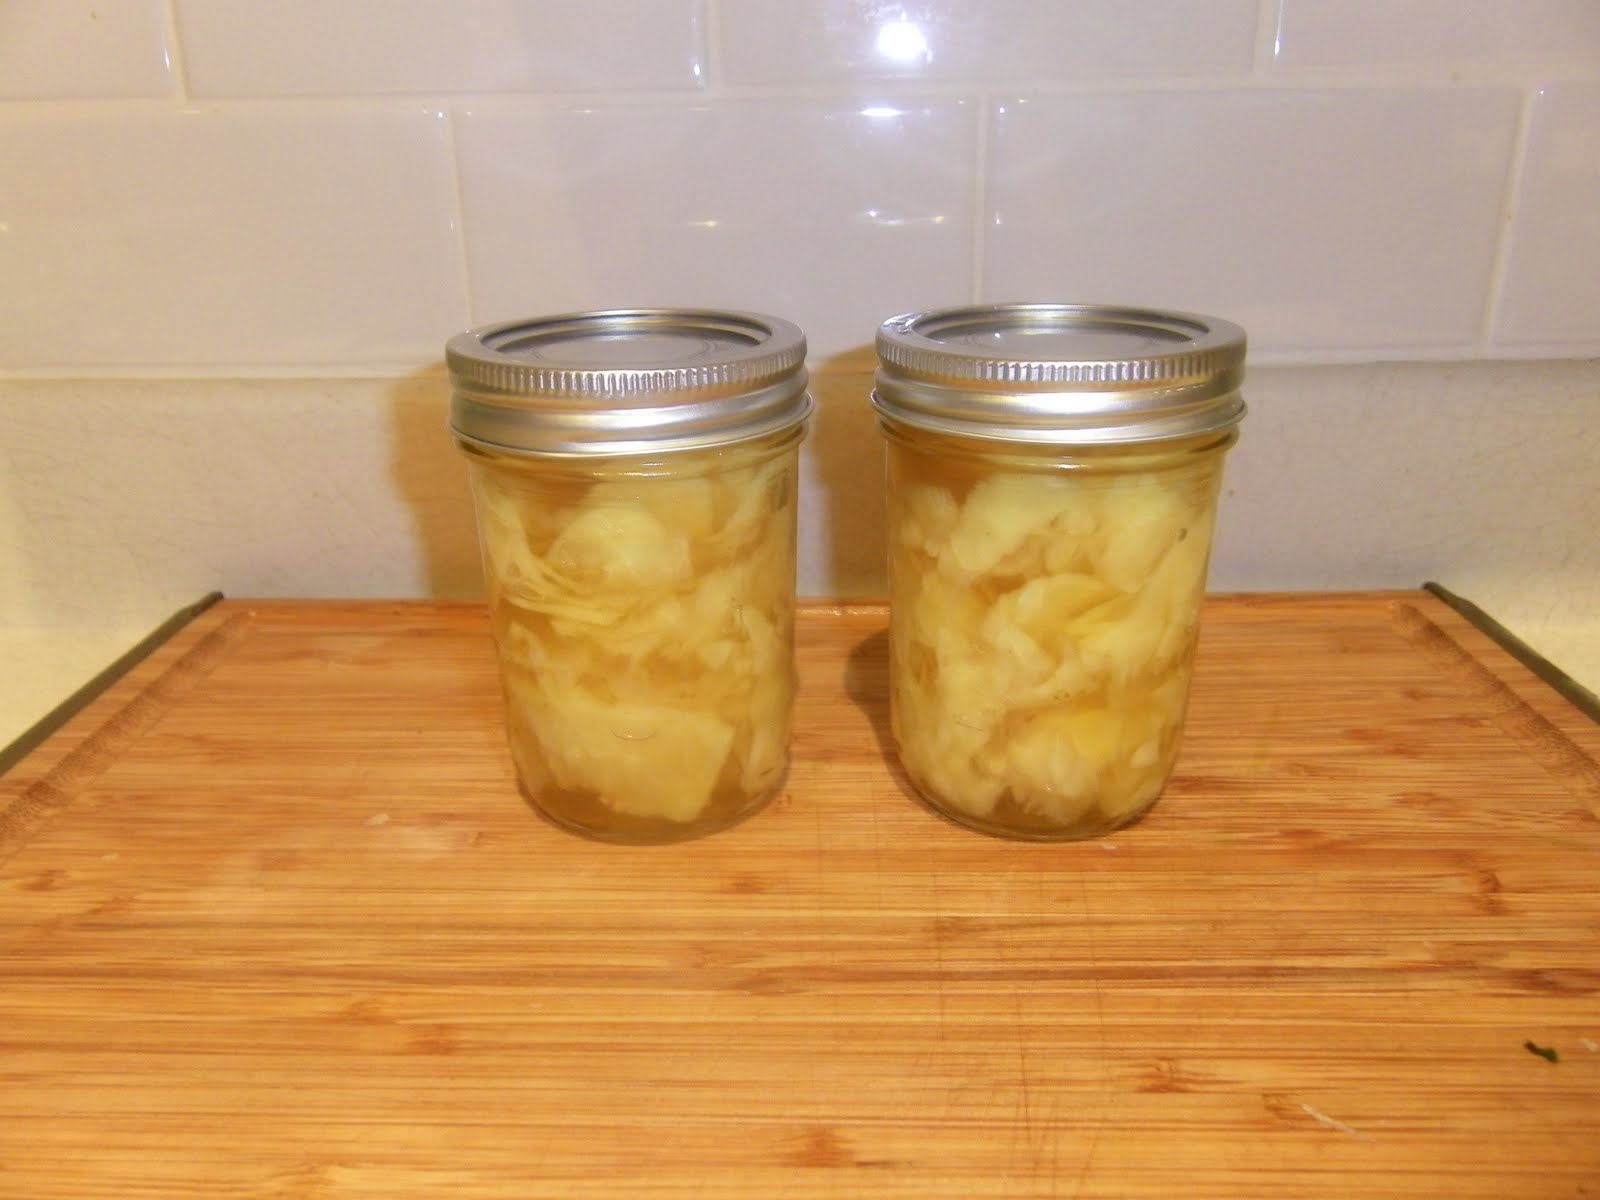
In preparation of tonight's up coming sushi making night I have planned with a couple of friends, I decided to make my own pickled ginger. By co-incidence, I had bought a food magazine this week and it just so happened to have a recipe for pickled ginger. Really random as I had already planned the sushi night before I even saw the magazine and I have never seen a recipe before for homemade pickled ginger. For those of you less familiar with sushi, every order is served with 2 things, wasabi and pickled ginger. Wasabi is a very hot, usually bright green, paste made from a type of horseradish. It is one of the few food on this planet that I have not acquired a taste for. It looks fairly innocent but beware, even a pin head sized sampling will take off at least a few tastebuds and clear out your sinuses, even if they aren't blocked. The pickled ginger, usually dyed pink, is a palate cleanser for between each type of sushi and this I love. A few sushi places I go to do use the natural pickled ginger (which can naturally have a pinkish hue due to the rice vinegar reaction) but many still used the dyed pink stuff for aesthetics, I presume.
The ingredient list is short but the process was quite involved and probably took me an hour from start to end.
Homemade Pickled Ginger
1 lb ginger root
2 cups unseasoned rice vinegar or apple cider vinegar or white vinegar
3/4 cup white sugar
1 tbs table salt
(you will also need canning jars)

1) sterilize jars (see below for directions)
2) peel and thinly slice ginger
3) mix sugar, vinegar and salt in a pan and dissolve over med heat. Bring to boil and when boiling, remove from heat and cover.
4) bring large pot of water to boil. When boiling add ginger for 30 seconds to soften. Drain well in colander.
5) place ginger in jars, pour syrup over top and let cool with lids on. Refrigerate when cooled.
First thing was to sterilize the mason/canning jars. This requires boiling the jars in a large pan of water for 10 minutes. Seasoned canners (not me) apparently have a rack that fits into the pan so the jars don't touch the bottom but I did not have this so I used my metal vegetable steamer and put it on the bottom of the pan and it worked fine although I kept my distance from the stove just in case something exploded.
While that was busily sterilising away all bacteria known to man, I got to work peeling the ginger. This is quite a task. I already learned a couple of years ago that using a metal teaspoon is the best tool for peeling ginger while not losing too much ginger and not losing any knuckle skin from a vegetable peeler. I had purchased 2 large roots of ginger, I don't know if it was 1lb in weight, probably about 1/2lb but it was a lot to peel and whose measuring? I started with the first piece and while the spoon worked, it was messy as all the tiny shards of ginger peel stuck to everything. My thumbs and hand started to ache after a few minutes but I got it done, all the while seriously contemplating if doing the second root was necessary and whether an industrial machine existed that could peel ginger root efficiently.


After peeling came slicing. It is supposed to be very thinly sliced, paper thin. I had a mandolin (not a very good one although very sharp still) and a vegetable peeler. I started with the mandolin. Way too thick and I was terrified of slicing off a finger so I switched to the handheld peeler which made for a much thinner slice but also caught my knuckles a couple of times in the process. Apparently it's easier to peel myself than it is to slice ginger.
Exhausted after peeling and slicing one root, I set to work on the second one and got yet another knuckle scrape. Clearly not at peak focus today.
I had amassed a big pile of sliced ginger varying in thickness from paper thin to doorstep thick but I was proud of myself.
I then created the canning liquid syrup in a pan and brought to a boil, covered and remove from heat.
I then boiled another large pan of water. This recipe uses a lot of large pans, I did not have enough so I used my Le Creuset cast iron casserole dish for this one. I then added the ginger and softened for 30 seconds before draining.
I filled the jars with the ginger, poured on the syrup and voila! It's now in the fridge awaiting the guinea pigs (MM and D). I mean "the tasters".

The ingredient list is short but the process was quite involved and probably took me an hour from start to end.
Homemade Pickled Ginger
1 lb ginger root
2 cups unseasoned rice vinegar or apple cider vinegar or white vinegar
3/4 cup white sugar
1 tbs table salt
(you will also need canning jars)

1) sterilize jars (see below for directions)
2) peel and thinly slice ginger
3) mix sugar, vinegar and salt in a pan and dissolve over med heat. Bring to boil and when boiling, remove from heat and cover.
4) bring large pot of water to boil. When boiling add ginger for 30 seconds to soften. Drain well in colander.
5) place ginger in jars, pour syrup over top and let cool with lids on. Refrigerate when cooled.
First thing was to sterilize the mason/canning jars. This requires boiling the jars in a large pan of water for 10 minutes. Seasoned canners (not me) apparently have a rack that fits into the pan so the jars don't touch the bottom but I did not have this so I used my metal vegetable steamer and put it on the bottom of the pan and it worked fine although I kept my distance from the stove just in case something exploded.
While that was busily sterilising away all bacteria known to man, I got to work peeling the ginger. This is quite a task. I already learned a couple of years ago that using a metal teaspoon is the best tool for peeling ginger while not losing too much ginger and not losing any knuckle skin from a vegetable peeler. I had purchased 2 large roots of ginger, I don't know if it was 1lb in weight, probably about 1/2lb but it was a lot to peel and whose measuring? I started with the first piece and while the spoon worked, it was messy as all the tiny shards of ginger peel stuck to everything. My thumbs and hand started to ache after a few minutes but I got it done, all the while seriously contemplating if doing the second root was necessary and whether an industrial machine existed that could peel ginger root efficiently.


After peeling came slicing. It is supposed to be very thinly sliced, paper thin. I had a mandolin (not a very good one although very sharp still) and a vegetable peeler. I started with the mandolin. Way too thick and I was terrified of slicing off a finger so I switched to the handheld peeler which made for a much thinner slice but also caught my knuckles a couple of times in the process. Apparently it's easier to peel myself than it is to slice ginger.
Exhausted after peeling and slicing one root, I set to work on the second one and got yet another knuckle scrape. Clearly not at peak focus today.
I had amassed a big pile of sliced ginger varying in thickness from paper thin to doorstep thick but I was proud of myself.
I then created the canning liquid syrup in a pan and brought to a boil, covered and remove from heat.
I then boiled another large pan of water. This recipe uses a lot of large pans, I did not have enough so I used my Le Creuset cast iron casserole dish for this one. I then added the ginger and softened for 30 seconds before draining.
I filled the jars with the ginger, poured on the syrup and voila! It's now in the fridge awaiting the guinea pigs (MM and D). I mean "the tasters".
Tuesday, July 12, 2011
Healing...with the help of sushi and chocolate banana pie
It's 2 weeks today that I got injured and I'm happy to report that I feel I've made a lot of progress in the past day or two, as a result of my targeted recovery program. This program involves the following:
1) Rest-easier said than done for me, especially with the recent house move but I've committed to resting and I have noticed a difference. Thanks to all my friends and family who have helped out driving me around and carrying my bags and bringing me food!
2) Ibuprofen every 4 hours. To reduce inflammation. I learned early on that I must not get caught out without my meds if 4 hours goes by as meltdown ensues. That seems to have subsided now, thank goodness.
3) Arnica cream applied to sternum and taken orally in tablet form 3 times a day. This is a homeopathic remedy that many people swear by. I certainly believe it, whenever I apply to any visible bruises, they disappear within 1-2 days instead of going horrible greeny/yellow colour for days.
4) Physiotherapy 2 x per week consisting of Tens machine to get my body to produce it's own painkillers and Laser to help the damaged cells heal. I'm unable to have any joint function assessed yet due the pain.
5) Chondroitin supplement 1 x day to help repair bones and cartilage.
6) sleep..lots! I've been clocking in 8-10hours per night of solid sleep. The healing is done when sleeping so this is the most important part, in my opinion. The bedroom at my new house is extremely conducive to good sleep and both me and PB have had solid sleeps there since we moved in. I think it's something to do with it being a big room with high ceilings so there is lots of air flow. And having the window open is crucial.
I'm now able to sleep on my front with minimal pain and to rotate a little further to each side. I can shrug my shoulders higher but I do have to do it slowly.
I was concerned at having a vast expanse of time ahead of me during my time off but it's actually gone pretty fast. I can do most things at home like admin/computer work and light chores and I can cook. I have been eating randomly though, mainly due to not having a regular schedule and not doing any major exercise. I have been having a late breakfast and then a very light snack for lunch. Evening meals have been bigger though. Last night, a friend from work was kind enough to visit and bring sushi for us and her son to eat. I hadn't been that hungry all day but was famished when she arrived and devoured a spinach gomae, salmon sashimi and a selection of rolls. There are leftovers waiting for me in the fridge today so lunch will happen!
Last week, I finally made a no bake frozen banana pie that I had spotted on one of my favourite blogs The Nourishing Gourmet. It's dairy free, wheat free and very healthy with minimal added sugar. It's also raw (if you use agave instead of honey) and vegan. Sometimes I have found that allergy free versions of foods are really unhealthy but this one, and this blog, in general are very healthy and tasty. The blogger adapted it from Clean Eating Magazine which is a great magazine and there is a link in my sidebar to the website and to the blog too.
Frozen Chocolate Banana Pie
Crust
1 cup of almonds, (soaked and dehydrated, optional)
2 tablespoons honey
2 tablespoons butter or coconut oil
Pie Filling:
5 bananas
1 cup of full fat coconut milk
½ cup of cocoa powder
1 teaspoons vanilla
1) Toast the almonds in a small saucepan over medium-high heat until browned and fragrant. Place in a food processor with the butter and honey. Blend until finely ground. Push evenly into the bottom of a greased 8 inch springform pan, or pie pan.
2) Rinse out the food processor and add the pie filling ingredients to it. Blend until quite smooth, scraping down the sides as needed. Pour over pie crust and freeze until well set (at least 4 hours).


3) Use a very sharp knife to cut into pieces. Can let sit for about 20 minutes to soften it up a bit. For presentation and added flavor, top with sliced bananas, sliced almonds, or chocolate shavings.
The pie certainly looked appetizing and was easy to make but when I've made stuff like this before, the ice crystals can be a problem. When I first took it out of the oven, I mean freezer, It was close to impossible to cut and then I remembered the recipe said to leave it for 20 mins to warm up a bit. That did help but I still need to use a really sharp heavy wusthof knife and it was still too much for me with the injury so I got some help.
The verdict on the pie from all who sampled was a resounding "DELICIOUS!" and I would for sure make this again. The base is really tasty and almost chewy. I'd like to experiment more with a more crumbly base like a cheesecake but I really like this base too and most people commented on the base before anything else. The topping was rich and satisfying but it was great to know the only sweetness came from the bananas. I preferred it slightly more melted and mouss-ey but having a more frozen piece added a nice texture. PB LOVED this dessert and his mom told me he usually doesn't eat dessert so I was secretly feeling very smug. His Dad, PB senior on the other hand, loves desserts. Particularly of the chocolate variety I have observed and he loved this too. My friend D was the first to taste it and she suggested making fudgsicles with the topping. I'll need to get some moulds but this would work great and they wouldn't need to sit for 20 mins before eating.
I refroze the pie several times and it hasn't seemed to affect the taste or quality. There is still a wedge in the fridge that I will pull out later in the week.
Overall verdict: Try it, it's a light, healthy alternative to cheesecake and chocolate pie.
1) Rest-easier said than done for me, especially with the recent house move but I've committed to resting and I have noticed a difference. Thanks to all my friends and family who have helped out driving me around and carrying my bags and bringing me food!
2) Ibuprofen every 4 hours. To reduce inflammation. I learned early on that I must not get caught out without my meds if 4 hours goes by as meltdown ensues. That seems to have subsided now, thank goodness.
3) Arnica cream applied to sternum and taken orally in tablet form 3 times a day. This is a homeopathic remedy that many people swear by. I certainly believe it, whenever I apply to any visible bruises, they disappear within 1-2 days instead of going horrible greeny/yellow colour for days.
4) Physiotherapy 2 x per week consisting of Tens machine to get my body to produce it's own painkillers and Laser to help the damaged cells heal. I'm unable to have any joint function assessed yet due the pain.
5) Chondroitin supplement 1 x day to help repair bones and cartilage.
6) sleep..lots! I've been clocking in 8-10hours per night of solid sleep. The healing is done when sleeping so this is the most important part, in my opinion. The bedroom at my new house is extremely conducive to good sleep and both me and PB have had solid sleeps there since we moved in. I think it's something to do with it being a big room with high ceilings so there is lots of air flow. And having the window open is crucial.
I'm now able to sleep on my front with minimal pain and to rotate a little further to each side. I can shrug my shoulders higher but I do have to do it slowly.
I was concerned at having a vast expanse of time ahead of me during my time off but it's actually gone pretty fast. I can do most things at home like admin/computer work and light chores and I can cook. I have been eating randomly though, mainly due to not having a regular schedule and not doing any major exercise. I have been having a late breakfast and then a very light snack for lunch. Evening meals have been bigger though. Last night, a friend from work was kind enough to visit and bring sushi for us and her son to eat. I hadn't been that hungry all day but was famished when she arrived and devoured a spinach gomae, salmon sashimi and a selection of rolls. There are leftovers waiting for me in the fridge today so lunch will happen!
Last week, I finally made a no bake frozen banana pie that I had spotted on one of my favourite blogs The Nourishing Gourmet. It's dairy free, wheat free and very healthy with minimal added sugar. It's also raw (if you use agave instead of honey) and vegan. Sometimes I have found that allergy free versions of foods are really unhealthy but this one, and this blog, in general are very healthy and tasty. The blogger adapted it from Clean Eating Magazine which is a great magazine and there is a link in my sidebar to the website and to the blog too.
Frozen Chocolate Banana Pie
Crust
1 cup of almonds, (soaked and dehydrated, optional)
2 tablespoons honey
2 tablespoons butter or coconut oil
Pie Filling:
5 bananas
1 cup of full fat coconut milk
½ cup of cocoa powder
1 teaspoons vanilla
1) Toast the almonds in a small saucepan over medium-high heat until browned and fragrant. Place in a food processor with the butter and honey. Blend until finely ground. Push evenly into the bottom of a greased 8 inch springform pan, or pie pan.
2) Rinse out the food processor and add the pie filling ingredients to it. Blend until quite smooth, scraping down the sides as needed. Pour over pie crust and freeze until well set (at least 4 hours).


3) Use a very sharp knife to cut into pieces. Can let sit for about 20 minutes to soften it up a bit. For presentation and added flavor, top with sliced bananas, sliced almonds, or chocolate shavings.
The pie certainly looked appetizing and was easy to make but when I've made stuff like this before, the ice crystals can be a problem. When I first took it out of the oven, I mean freezer, It was close to impossible to cut and then I remembered the recipe said to leave it for 20 mins to warm up a bit. That did help but I still need to use a really sharp heavy wusthof knife and it was still too much for me with the injury so I got some help.
The verdict on the pie from all who sampled was a resounding "DELICIOUS!" and I would for sure make this again. The base is really tasty and almost chewy. I'd like to experiment more with a more crumbly base like a cheesecake but I really like this base too and most people commented on the base before anything else. The topping was rich and satisfying but it was great to know the only sweetness came from the bananas. I preferred it slightly more melted and mouss-ey but having a more frozen piece added a nice texture. PB LOVED this dessert and his mom told me he usually doesn't eat dessert so I was secretly feeling very smug. His Dad, PB senior on the other hand, loves desserts. Particularly of the chocolate variety I have observed and he loved this too. My friend D was the first to taste it and she suggested making fudgsicles with the topping. I'll need to get some moulds but this would work great and they wouldn't need to sit for 20 mins before eating.
I refroze the pie several times and it hasn't seemed to affect the taste or quality. There is still a wedge in the fridge that I will pull out later in the week.
Overall verdict: Try it, it's a light, healthy alternative to cheesecake and chocolate pie.
Sunday, July 10, 2011
Tis the season to be berry

As promised, here is the daily blog update which I intend to continue with for the duration of my time recovering. Having ample time to research recipes, a decent internet connection (which I did not have until I moved here last week) and a fantastic kitchen for cooking in means I should easily be able to fulfill this commitment.
Today's time in the kitchen was spent making a recipe from a blog that a friend and colleague, GGG, sent to me. The blog is called Berry Blue Toes which has tonnes of raw and healthy but really tasty recipes. I also love the blog name and the font used for the main page blog title! The writer also blends the recipes wit knowledge of chakras. A bit spiritual but that interests me. This recipe is good for the third chakra which is associated with the pituitary gland, eyes, nose, ears and skeletal system. Probably a good thing for me to be eating for my bone bruise then.
I modified the recipe a bit by adding Mary's Ginger Crackers in place of some of the oatmeal. I also plan to add some chia seeds and hemp seeds next time to increase the fibre and protein content further. I also made (sans recipe!) a creamy coconut drizzle to pour on.
Raw Berry Crisp
* 6C of mixed Blueberries, Raspberries and Blackberries
* 2 tsp of maple syrup/honey/agave nectar
* 1C of pre Soaked Raw Walnuts
* 1/2T of vanilla
* 1/2C of Slivered Almonds
* 1t of cinnamon
* 1/2c dried Cranberries
* 1C of chopped dates
* 1C of Rolled Oats
In a dish mix berries and cranberries with honey maple syrup and vanilla. In a food processor pulse nuts, cinnamon, dates and oats. Serve in parfait cups layered or layer in a medium sized square cake pan (berries under nut mix on top) - best chilled in the fridge for a few hours before serving.
I used 2 tsp maple syrup in my first version and I substituted 1/2 cup of oatmeal for 3 Mary's ginger cookies.
 These are a recent find and are allergy free. Mary's does savory crackers too and I'm sure they will be coming out with more products. I certainly home so. They can be purchased at London Drugs and some Superstores. Probably Whole Foods too, who incidentally have the best price for Mary's products but only when they are on sale which is a couple of times a year but they go on sale for half price. Most other stores only knock $1-2 off the retail price. Costco does sell bulk boxes of the savory crackers so they may eventually do the sweet ones too. Berry season is in full bloom in BC at the moment. Berry stands and farmers markets have overflowing punnets of cherries, raspberries and strawberries galore. Blueberries are not quite in season yet so we're still getting them from Southern Cali at the moment but my friend, D, bought me over some frozen blueberries from her mom's garden last year that were frozen so I used those in this dish along with some BC blackberries and raspberries from just across the border in Washington state that the Condiment Queen and Pb senior picked up on their recent jaunt there. Last year I grew strawberries in my vegetable garden and amassed as many as 6 strawberries in my haul. This year, my strawberry plant was on steroids or something as it was producing many more and way earlier than anyone else I know. Sadly I had to leave it as I moved house and didn't want to uproot it but it was nice to know the legacy of my tenancy there will remain. Not sure how important soaking the walnuts is but I did it anyway. I just put them in a bowl and put some water in and left them overnight. They had soaked up most of the water by morning and looked all plumpy.
I layered the dish as directed and placed it in the fridge but you can't see the beauty of the berries as they are covered so I pulled out my solo surviving martini glass and layered up in that for the impending photo op.
The blog suggested drizzling coconut milk over the top but I thought this would be too watery so I made my own Creamy Coconut Drizzle from coconut cream in a box (sulphite free) which GGG discovered at Superstore.
 It's basically solid at room temp. I plunked it in the food processor with 1 tsp vanilla and 1 tbs creamy honey. I added 1/2 cup boiling water and carefully blended until creamy. I dipped my pinky in and had a wee taste.....OMG! Deeeeeeviiine! I could just sit and eat that! I think it would be good frozen too. But as the intended drizzle, perfect!
Saturday, July 9, 2011
A minor inconvenience

So, I guess I tempted fate by detailing my strenuous fitness schedule in my last post and have since suffered an injury that has sidelined me from all physical activity and is preventing me from going to work until at least July 16th when I next see my doctor for re-assessment. I sustained the injury while at a concert on Tuesday last week with PB. I was at the front, enjoying the great view and soaking up the energy of the live music when I got slammed hard into the metal bar on the barrier in front of me, just below my collar bone. As I had neglected to wear my body armour that night, it winded me and caused a lot of pain. Not a whole lot of protection just under the collar bone for this kind of impact. I shook it off though and adrenalin kicked in masking the pain. The next morning, I woke up,reviewed the night in my head and then realised I couldn't move an inch to get out of bed without intense chest pain. Major panic! I suspected a fractured rib or sternum which could be confirmed by X-ray but first I had to get to the hospital. Luckily PB was next to me and by painful trial and error we managed to get me to a standing position so I could get out to the car.
2 sets of x rays, a cocktail of painkillers and three and a half hours later, I was discharged with a diagnosis of sternum and chest wall bruising. Prescription in hand for more painkillers and a prognosis of it getting worse before getting better with a slow recovery, I was outta there with a glum face and a lot of wincing. This also happened to be the day PB and I were moving house. Without movers. Great combo. Luckily PB is very capable of doing lots of physical labour and I am very skilled at watching.
So 10 days has passed and I am still doing nothing beyond sitting, walking and a lot of talking/emailing/resting. At least another week off work, maybe more. I'm not allowed to return until I can do my job as gym manager and personal trainer. Might be a while....boo hoo.
However, one of the upsides of the time off is lots of time to sort out my pile of disorganised recipes, time to bake (although I need people to take me to the shops as I can't carry heavy stuff or drive myself there) and time to update the blog with a lot of overdue posts for yummy recipes I have made in recent months. I'm planning at least one post per day so get ready for an onslaught.
today's recipe is a quickie, courtesy of one of my staff at work,we'll call him Big J because he's a tall guy and his name starts with J. Original.
He found this recipe and modified it and I have modified it a little further.
No-Bake Granola Bars
1 Ripe Banana (mashed)
1 ½ cups Oats
½ cup Shredded Coconut (I used sweetened)
½ cup Raisins (or date chunks, cranberries, craisins, dried cherries/mangoes/apricots/etc. Any dried fruit will work)
1/3 cup Maple Syrup (add more for more sweetness)
½ cup Peanut Butter, 100% natural is best (or any nut butter, i.e. almond, pecan, cashew, etc.)
Stir all ingredients together and press down into a baking dish or pan so it is about 1 inch deep. Freeze for an hour or two and then cut in to shapes.
I also added 1/4 cup chia seeds, 1/4 cup sunflower seeds, 1/4 cup hemp seeds (to boost the protein content.
These are yummy, filling and satisfying. I especially love finding a big chunk of peanut butter. I didn't put the coconut in as dried coconut, unless organic, has sulphites in it which I am sensitive to. They are in lots of things but dried fruit is exceptionally high and results in me looking like I am about to give birth i.e. balloon stomach which is not such a good look.
Coming soon....more no bake desserts, a refreshing summer supper and hopefully retention of my sanity as I move into 2 weeks with no exercise or work. Thank goodness I can still cook and bake. If you come and visit, I guarantee I will feed you well!
Saturday, June 25, 2011
Foodie Math: More exercise=more room for food
I thought I would move away from food for one post and talk a little about what I do for fitness. It’s sorta related to food as I have to plan my food around my workouts, or sometimes, my workouts around my food. I workout in some form or other most days of the week but do I change what I do during the year depending on weather, races etc.
This year, for Jan-June a typical week looked like this:
Mon Strength workout (BFL) 30-45 mins
Tuesday Spin class 75 mins aka Sweat fest
Weds Strength workout (BFL) 30-45 mins
Thursday netball training 1.5 hours aka run around while having chit chat with the girls in between
Friday Strength workout (BFL) 30-45 mins
Sat netball game 1 hour
Sun Rest day or easy hike (if nice weather-which hasn’t been very often this year to date!)
BFL stands for Body For Life. It’s a 12 week fitness training program that’s been around for years. You can read more about it here www.bodyforlife.com.
There are 3 components, cardio, strength and also a food plan. The appeal of the program is that you alternate between cardio and strength workouts during the week. You do 3 cardio and 3 strength workouts but they are all short. Strength days are 30-45 mins and cardio is 20 mins but of intense interval training.
I really wanted to focus on my strength as this area has fallen short over the past year due to injuries.
I decided to follow the strength plan listed but I would insert my own cardio workouts in as I had netball and spin class already going. Conveniently, they fell on Tu/Th/Sat allowing me to do the strength workouts on M/W/F as dictated in the plan.
I finished the 12 week program last week and am stronger than I have ever been. My arms are strong (I’d even go so far as to say pumped), I’m lifting more weight than ever with my upper and lower body and confident in my body’s ability to handle almost anything! I usually work very well with a structured plan so I devised my own 3 month plan for the summer. It’s pretty similar in essence with alternating strength and cardio days but I have some specific goals I want to achieve during that time. I want to be able to do pull ups….unassisted! I’ve never been able to do them but then again, I’ve never trained myself specifically to do them. That is the focus of this plan. I also have my fantastic workout partners who make a huge difference to my commitment and confidence in the program. The BFL food program followed a simple structure. Eat 6 times a day, small meals containing one portion each of protein, carbs and fats from the list provided. I tried it but it was too much food for me and I felt like I was snacking all day and never having a full meal. I love snacking but it’s best when between meals, not AS the meal.
My cardio plan changes slightly for the summer. Netball drops to once per week and I’m outside more running and hiking. The Grouse Grind is my big cardio focus in the summer. For those of you unfamiliar with it, it’s climbing a mountain trail that's steep and relentless. It’s famous in these parts as a great workout/pastime. Anywhere from 35-90 minutes of pure uphill slog dubbed Mother Nature’s Stairmaster. Last year I was on the trail about 2-3 x per week and got pretty fast averaging 50 minutes. I don’t enjoy it, per se, when I’m on there but I know it’s a great workout and there is no slacking! You are committed to finish and the faster you go, the sooner it’s over. It helps that there is the best view of the city at the top as well as beer if you want. The nice part is that you get to ride the tram down as it’s a one way hike. I’ve done it twice this year so far with the goal of doing it 1-2x per week. So far they’ve both been a slog and I’m 99% sure that’s due to not eating right for the hike. By that I mean, eating the right type of food at the right time. I eat well always but when preparing for intense exercise, I find that what I eat the day before and also just prior to the exertion is key to enjoyment/success. I did the Grouse Grind lots last year so I experimented with nutrition. I was very focused on improving my time as I had entered the annual Grouse Grind Mountain Run that was at the end of September. Cutting even just 1 minute off my time took a whole lot of extra effort as I am at max exertion for the whole climb (picture heavy breathing, beet red face, sweat dripping off ponytail-yes I CHOOSE to do this to myself). Losing/gaining 1-2lb body weight affected my time, the air temperature affected my time, what I had/hasn’t eaten or drank affected my time. Through a process of trial and error, I discovered what worked well. Green tea just before I set out in my car for the 15 min drive to the trail really gave me a good energy buzz and cleared my head. I had to make sure not to drink too much though as I hate feeling the need to pee halfway through. There are no washrooms during the hike, only at the start and end, unless you want to take your chances off the trail with the bears and the steep drop offs.
I also need to rest the day before…no netball, no heavy leg workouts, no late nights, no crazy drinking! For food, what I ate the day before helped. I ate clean but need to eat more in the way of carbs such as oats, grains etc to build my glucose stores up. The day of the climb, eat a larger meal a few hours before and then have a snack about 30 mins before. I found the best pre-climb snack was a homemade energy pudding from the Thrive Diet (www.thrivediet.com).
2 bananas
½ cup dates
¼ cup ground flaxseed
¼ cup roasted carob powder (or cacao nibs to make pudding 100% raw)
1 tbsp coconut oil
1 tsp lemon juice
¼ tsp sea salt
Blend in a food processer. I would make a batch and have about ½ to 1/3 of the product. I find my blood sugar drops fast once I get hungry. I have to eat every 2-3 hours in some form. As soon as I start feeling hungry, I know it’s only about 30-60 min until I start to feel lightheaded and unwell. So for me, I eat this pudding before I leave the house and it doesn’t cause me indigestion or cramps during the hike. It looks kinda chocolate mouss-ey but tastes good, goes down easily and does it’s job well.
So even though I started this post on exercise, it has come around to food! I’ve done the Grind twice this year so far and both have been sluggish and slow but I wasn’t following my pre-climb routine. I’ll try it next time and see how it affects my time. I’m hoping to get down to 50 mins again but I’ll be happy with 52. Obsessed? Moi?
This year, for Jan-June a typical week looked like this:
Mon Strength workout (BFL) 30-45 mins
Tuesday Spin class 75 mins aka Sweat fest
Weds Strength workout (BFL) 30-45 mins
Thursday netball training 1.5 hours aka run around while having chit chat with the girls in between
Friday Strength workout (BFL) 30-45 mins
Sat netball game 1 hour
Sun Rest day or easy hike (if nice weather-which hasn’t been very often this year to date!)
BFL stands for Body For Life. It’s a 12 week fitness training program that’s been around for years. You can read more about it here www.bodyforlife.com.
There are 3 components, cardio, strength and also a food plan. The appeal of the program is that you alternate between cardio and strength workouts during the week. You do 3 cardio and 3 strength workouts but they are all short. Strength days are 30-45 mins and cardio is 20 mins but of intense interval training.
I really wanted to focus on my strength as this area has fallen short over the past year due to injuries.
I decided to follow the strength plan listed but I would insert my own cardio workouts in as I had netball and spin class already going. Conveniently, they fell on Tu/Th/Sat allowing me to do the strength workouts on M/W/F as dictated in the plan.
I finished the 12 week program last week and am stronger than I have ever been. My arms are strong (I’d even go so far as to say pumped), I’m lifting more weight than ever with my upper and lower body and confident in my body’s ability to handle almost anything! I usually work very well with a structured plan so I devised my own 3 month plan for the summer. It’s pretty similar in essence with alternating strength and cardio days but I have some specific goals I want to achieve during that time. I want to be able to do pull ups….unassisted! I’ve never been able to do them but then again, I’ve never trained myself specifically to do them. That is the focus of this plan. I also have my fantastic workout partners who make a huge difference to my commitment and confidence in the program. The BFL food program followed a simple structure. Eat 6 times a day, small meals containing one portion each of protein, carbs and fats from the list provided. I tried it but it was too much food for me and I felt like I was snacking all day and never having a full meal. I love snacking but it’s best when between meals, not AS the meal.
My cardio plan changes slightly for the summer. Netball drops to once per week and I’m outside more running and hiking. The Grouse Grind is my big cardio focus in the summer. For those of you unfamiliar with it, it’s climbing a mountain trail that's steep and relentless. It’s famous in these parts as a great workout/pastime. Anywhere from 35-90 minutes of pure uphill slog dubbed Mother Nature’s Stairmaster. Last year I was on the trail about 2-3 x per week and got pretty fast averaging 50 minutes. I don’t enjoy it, per se, when I’m on there but I know it’s a great workout and there is no slacking! You are committed to finish and the faster you go, the sooner it’s over. It helps that there is the best view of the city at the top as well as beer if you want. The nice part is that you get to ride the tram down as it’s a one way hike. I’ve done it twice this year so far with the goal of doing it 1-2x per week. So far they’ve both been a slog and I’m 99% sure that’s due to not eating right for the hike. By that I mean, eating the right type of food at the right time. I eat well always but when preparing for intense exercise, I find that what I eat the day before and also just prior to the exertion is key to enjoyment/success. I did the Grouse Grind lots last year so I experimented with nutrition. I was very focused on improving my time as I had entered the annual Grouse Grind Mountain Run that was at the end of September. Cutting even just 1 minute off my time took a whole lot of extra effort as I am at max exertion for the whole climb (picture heavy breathing, beet red face, sweat dripping off ponytail-yes I CHOOSE to do this to myself). Losing/gaining 1-2lb body weight affected my time, the air temperature affected my time, what I had/hasn’t eaten or drank affected my time. Through a process of trial and error, I discovered what worked well. Green tea just before I set out in my car for the 15 min drive to the trail really gave me a good energy buzz and cleared my head. I had to make sure not to drink too much though as I hate feeling the need to pee halfway through. There are no washrooms during the hike, only at the start and end, unless you want to take your chances off the trail with the bears and the steep drop offs.
I also need to rest the day before…no netball, no heavy leg workouts, no late nights, no crazy drinking! For food, what I ate the day before helped. I ate clean but need to eat more in the way of carbs such as oats, grains etc to build my glucose stores up. The day of the climb, eat a larger meal a few hours before and then have a snack about 30 mins before. I found the best pre-climb snack was a homemade energy pudding from the Thrive Diet (www.thrivediet.com).
2 bananas
½ cup dates
¼ cup ground flaxseed
¼ cup roasted carob powder (or cacao nibs to make pudding 100% raw)
1 tbsp coconut oil
1 tsp lemon juice
¼ tsp sea salt
Blend in a food processer. I would make a batch and have about ½ to 1/3 of the product. I find my blood sugar drops fast once I get hungry. I have to eat every 2-3 hours in some form. As soon as I start feeling hungry, I know it’s only about 30-60 min until I start to feel lightheaded and unwell. So for me, I eat this pudding before I leave the house and it doesn’t cause me indigestion or cramps during the hike. It looks kinda chocolate mouss-ey but tastes good, goes down easily and does it’s job well.
So even though I started this post on exercise, it has come around to food! I’ve done the Grind twice this year so far and both have been sluggish and slow but I wasn’t following my pre-climb routine. I’ll try it next time and see how it affects my time. I’m hoping to get down to 50 mins again but I’ll be happy with 52. Obsessed? Moi?
Sunday, June 5, 2011
My name is Sally and I am addicted to sushi
I love sushi. I love raw salmon and tuna. Yes I do! If you had asked me that 10 years ago I probably would have said you were out of your mind. Why would I eat raw fish....gross! Anyway, then I move to Vancouver aka sushi central and gradually worked up the courage to try some and.......guess who likes raw fish! For those of you who are at the stage I was at 10 years ago, don't fear, you can still enjoy sushi without eating raw fish. There are many rolls with vegetables and cooked fish or other proteins. Among my faves are Yam Roll, Avocado Roll and Gomae(a steamed spinach sesame dish). I do encourage you to be brave and try the raw fish though. It's so clean tasting and very good for you and who knows, it might just become one of you favourite foods as it has for me.
I have occasionally made my own sushi, mostly avocado rolls or vegetable rolls but I would like to make my own sashimi too. Sashimi is the name for pieces of raw fish, no rice. Whenever I buy sushi, I get salmon and tuna sashimi but it's very pricey, usually $10 for 6 small pieces...nowhere near enough for an addict like me. If I want to actually sustain myself, I have to buy a roll or two also and the bill quickly hits $20. I love my sashimi though, so I choose to have sushi less often but I have what I want when I order it. I have sourced out a couple of places to buy sashimi grade tuna and salmon. One is a japanese deli near my house. They sell frozen packages of sashimi shaped ready for cutting in to sashimi sized slices. For about $8 I can get 10 slices out of a piece. I also went to a fishmongers at Lonsdale Quay and asked if their salmon was sashimi grade. She said all their salmon was but you have to freeze it for 24 hours before consuming if it has not been previously frozen. This is to kill any parasites. Don't be put off.
Last week, I made myself the scrummiest sashimi salad with fresh Ahi Tuna. so simple to make and so delicious to eat.
1/2 avocado, sliced
1/2 mango, sliced
3 oz sashimi grade ahi tuna, sliced
fresh cilantro, finely chopped
1 tsp tamari or soy sauce
1 tsp toasted sesame oil
layer the avocado, mango and tuna as you wish and sprinkle with cilantro.
Mix tamari and sesame oil together to make a dressing and drizzle over salad.
Eat with Chopsticks.
You don't have to eat with chopsticks. I just find they force me to slow down and savour the flavours of my creation instead of inhaling it in one breath.
I have occasionally made my own sushi, mostly avocado rolls or vegetable rolls but I would like to make my own sashimi too. Sashimi is the name for pieces of raw fish, no rice. Whenever I buy sushi, I get salmon and tuna sashimi but it's very pricey, usually $10 for 6 small pieces...nowhere near enough for an addict like me. If I want to actually sustain myself, I have to buy a roll or two also and the bill quickly hits $20. I love my sashimi though, so I choose to have sushi less often but I have what I want when I order it. I have sourced out a couple of places to buy sashimi grade tuna and salmon. One is a japanese deli near my house. They sell frozen packages of sashimi shaped ready for cutting in to sashimi sized slices. For about $8 I can get 10 slices out of a piece. I also went to a fishmongers at Lonsdale Quay and asked if their salmon was sashimi grade. She said all their salmon was but you have to freeze it for 24 hours before consuming if it has not been previously frozen. This is to kill any parasites. Don't be put off.
Last week, I made myself the scrummiest sashimi salad with fresh Ahi Tuna. so simple to make and so delicious to eat.
1/2 avocado, sliced
1/2 mango, sliced
3 oz sashimi grade ahi tuna, sliced
fresh cilantro, finely chopped
1 tsp tamari or soy sauce
1 tsp toasted sesame oil
layer the avocado, mango and tuna as you wish and sprinkle with cilantro.
Mix tamari and sesame oil together to make a dressing and drizzle over salad.
Eat with Chopsticks.
You don't have to eat with chopsticks. I just find they force me to slow down and savour the flavours of my creation instead of inhaling it in one breath.
Subscribe to:
Posts (Atom)


